Video Recording Your Classroom Lessons
December 10, 2013
Have a lesson coming up that you'd like to record for sharing with other teachers? Maybe you want to do some self assessment or even share your teaching for evaluation by peers. Whether or not you have a video camera, iPad, or only a laptop, there are many ways you can do this to easily create a quality video product. Take a look at the three options below, then choose the one that works best for you. Consider not only your tech comfort level, but also the tools available and the time required.
Have a lesson coming up that you'd like to record for sharing with other teachers? Maybe you want to do some self assessment or even share your teaching for evaluation by peers. Whether or not you have a video camera, iPad, or only a laptop, there are many ways you can do this to easily create a quality video product. Take a look at the three options below, then choose the one that works best for you. Consider not only your tech comfort level, but also the tools available and the time required.
|
OPTION 1: THE EASY WAY
Using Your MacBook Equipment - MacBook or iMac Computer Time - just a few minutes before and after your lesson to set up and share Difficulty - pretty easy 
Step 1: Open "Photo Booth" from your application menu or dock
Step 2: Orient your computer so the camera at the top of your screen is facing the area where you will be teaching. Step 3: Select the "Video" option from the small image menu at the bottom of your Photo Booth screen. Push the red video camera when you are ready to begin recording. 
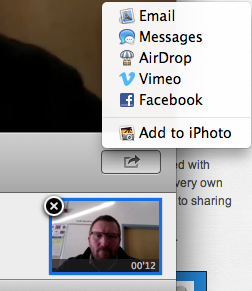
Step 4: When your lesson is finished click the stop button, then wait for a thumbnail image to appear in the bottom tray of Photo Booth. From here you can share the video. Save the video to your computer as a file to use later by using "Add to iPhoto".
|
OPTION 2: A LITTLE MORE DIFFICULT
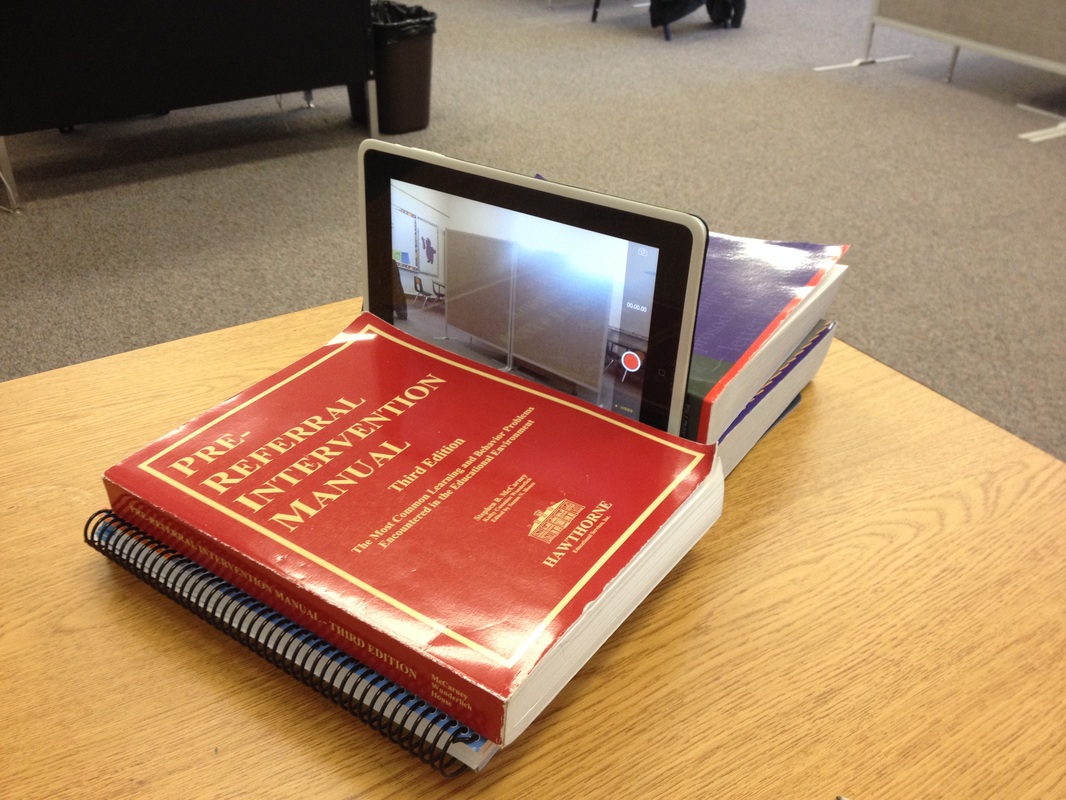
Using Your iPad Equipment - iPad2 or better Time - a few minutes before and a few minutes afterward depending on how you want to share your video Difficulty - easy if you know your iPad Step 1: Set up your iPad in the classroom with the camera oriented to properly capture your lesson and teaching. Books are a great way to prop up your iPad on an edge with the camera positioned at the top.
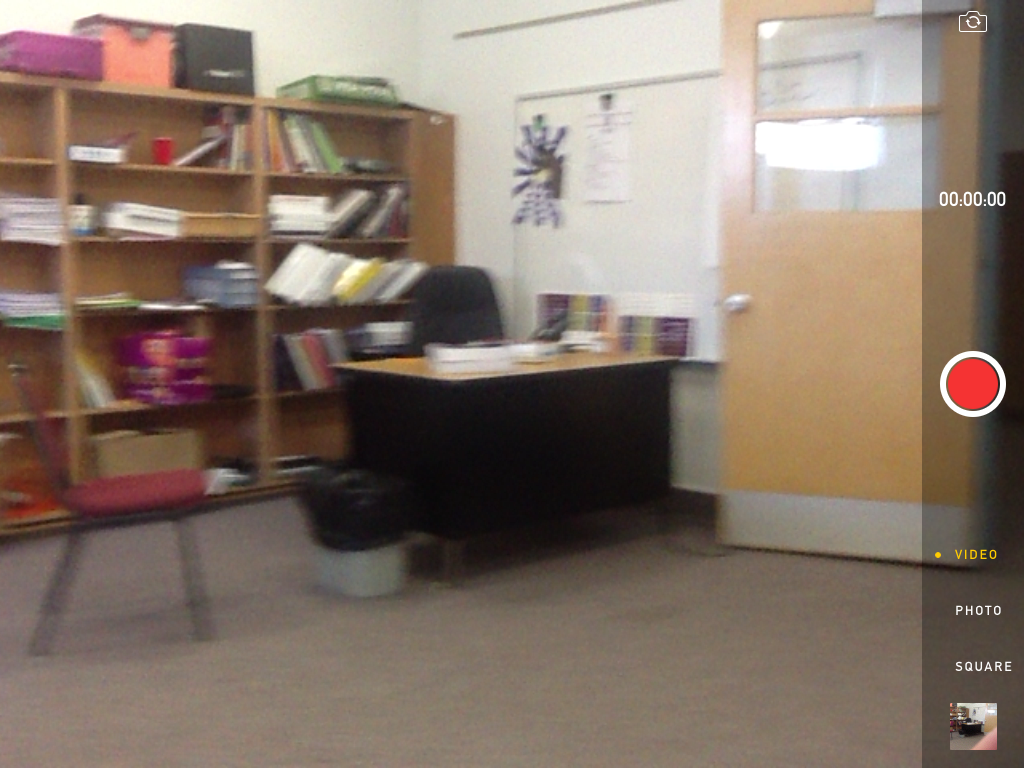
Step 2: Turn on your Camera App on the iPad and then select "Video" from the side menu. Tap the record button when you're ready to start your lesson. Click the same button when you are finished.
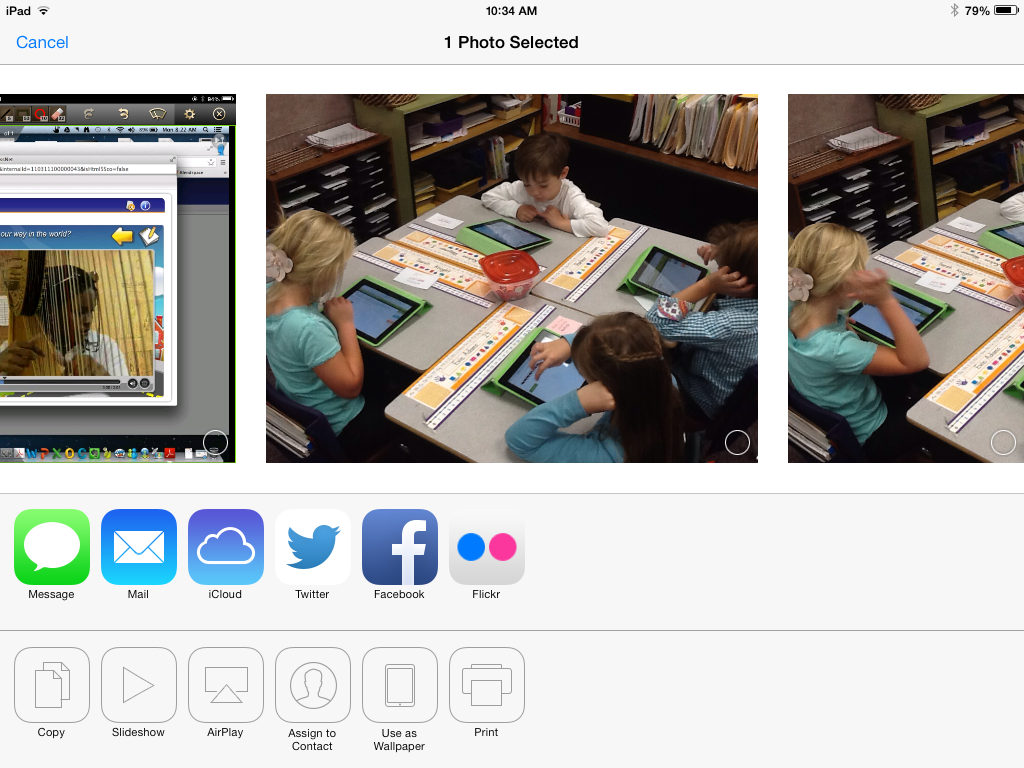
Step 3: Since your video is automatically saved to your Photo Library you can easily access it again later to save to a computer or share. If you're ready to share immediately, you may either email or upload the video using the "Send" button.
Bonus Tool!
Have a YouTube account? Why not upload your video to YouTube directly from the iPad so it's easy to share a link to your video rather than email a large file or save to a computer or flash drive! Need help? Contact your EdTech! |
OPTION 3: EVEN MORE DIFFICULT
Using a Video Camera & iMovie Equipment: Video Camera, tripod, computer and cables to connect the camera Time: a few minutes before your lesson to set up camera, and then plenty of time to download and convert the video afterwards Difficulty - you'll need to use several pieces of hardware and iMovie to edit so it's a little harder than the other options 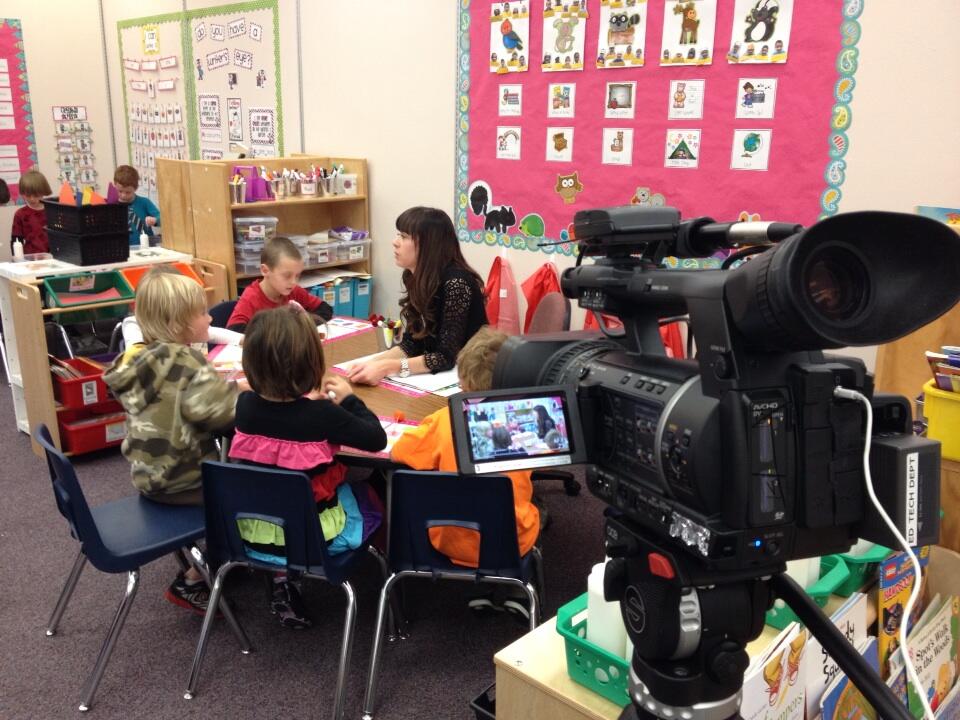
Step 1: Set up a video camera with tripod for stability and begin recording your lesson.
Step 2: When finished, connect your camera to your computer to transfer the video file(s) into iMovie or another video editing program. 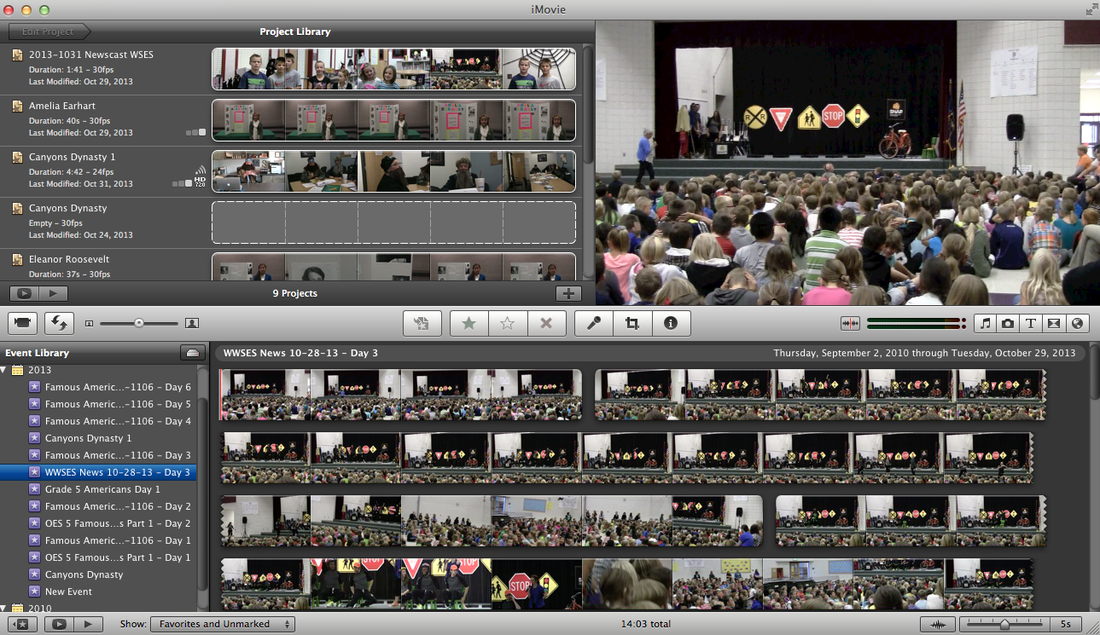
Step 3: Edit your video, then share as a file or upload to a server online to store the video file.
Optional: Dropbox, Google Drive, and YouTube are all great places to store and share your video files. This will allow you to invite other viewers and share the video without having to email or pass around a large video file. Need help? Contact your Ed Tech! 
|

Intro to Gmail for CSD Docs
|
September 27, 2013
Find links and resources on my BlendSpace page designed to show new users how to get started with Gmail and their "CSDDOCS" accounts. Canyons School District employees are all getting their very own Gmail and Google Drive accounts this year. As part of CSD Docs, these accounts will be limited to sharing and collaboration between only other CSD Docs users. This will help insure safe and secure communication between teachers, students, and all other collaborators in the CSD Docs system. |
Quick Intro to the ChromebookSeptember 17, 2013
Google Chromebooks are cloud based computing engines that allow teachers and students to complete online activities and projects without having to carry around a heavy, expensive, overpowered laptop. At a price point of $250 this device is not only lightweight and portable, but also inexpensive! Running on the Chrome Operating System, or a super powered version of the Chrome Browser, a Chromebook provides direct access to Google Drive, Google Docs, and a variety of web based apps like Edmodo, Class Dojo, and more. Along with Google Drive, the Chromebook is also great for web based programs like Pearson, iXL, Imagine Learning and flash based websites that might otherwise not work on an iPad. |
|
"License to Drive: Collaboration in the Cloud with Google Apps"
August 6, 2013
Google Drive (formerly known as Google Docs) is a free, internet based suite of products that allows users to create documents, spreadsheets, presentations, forms, and drawings. It's easy to invite multiple users to collaborate on a project, or even upload any file that you'd like to store and share online.
Check out my presentation from the 2013 "Flip'in Utah Conference" introducing Google Drive to teachers who would like a free and easy to use cloud based system to support collaboration in their "Flipped" classrooms. Click here to view "License to Drive"
